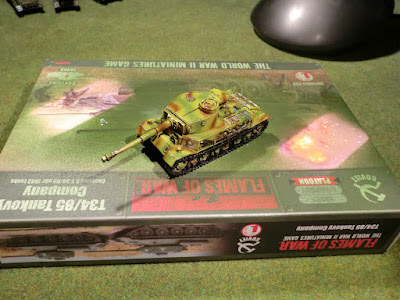
Done a little oil work this evening on a T-34 and Brummbar to see how they looked, I'm not really happy with the brummbar as I went a little overboard on the Zimmerit, however, I stil have time to manipulate this and remove excess.
My Painting/Gaming blog for my painting works past and present and recent games.
Showing posts with label miniature painting. Show all posts
Thursday, 1 March 2012
Quick Update (no pics)
Quick text only update, I've been working on a few commission pieces I've had for a few weeks but I'm having a few problems with them. Mainly in researching the new style basing of Motorcycles, I've been working on and based and base coated 4 small motorcycle teams only to find out that the new style stands have 2 x motorcycle/sidecar combinations on a large base.
Unfortunately the blister doesn't give enough to field even the smallest amount of teams to use them in a game so I'm at a bit of a loss on what to do. I'm thinking I may actually use what I have here and mod some older models I have in my bits box to make some "action poses"? I've got an old DAK bike and sidecar which is identical to the LW ones that I was thinking about using with a dismounted MG gunner firing over the back of it or something similar? then for the second stand I was considering using a standard bike team but with perhaps a kubelwagen/schwimmwagen based with it. I like to think this reflects some of the ramshackle supply issues that befell the Germans towards the end of the war and that they'll use anything serviceable for the role needed?
Saturday, 25 February 2012
New Mini Studio Tester Shots.
So I got a mini photography studio and I've taken some tester shots to see how much of a difference it makes.
I think the difference is pretty apparent, but I also need to dust my tanks :(
Friday, 24 February 2012
Further U.S. Infantry Updates!
Finished these two stands off this morning before I shoot off to work, quick, easy and look good on the table?
Thoughts and CC welcome!
Thursday, 23 February 2012
U.S. 3rd Armored Update.
Worked a little more on my U.S. Armoured Rifles today.
Got a couple of test stands 90% complete, they just need basing then hitting with a matte spray. I've gone with a flat grey paint for the gunmetal areas for a change to see what sort of a difference this makes, I've seen it done by various painters and it works very nicely.
Again, I'm really not trying to go all out on these guys, just to have them looking decent on the table top!
Got a couple of test stands 90% complete, they just need basing then hitting with a matte spray. I've gone with a flat grey paint for the gunmetal areas for a change to see what sort of a difference this makes, I've seen it done by various painters and it works very nicely.
Again, I'm really not trying to go all out on these guys, just to have them looking decent on the table top!
Tuesday, 21 February 2012
U.S. 3rd Armored Update.
I'm a little sick of working on tanks at the moment so I've been doing a lot of work on my Armoured rifle Platoon to support my 3rd Armored Division.
They've been based for a week or so and today I've done the gaiters and jackets on all stands and also their trousers. I'm planning in trying to oil wash all of these guys at once to see how it turns out with a view to using that technique in future for non-camouflaged uniforms. All that now remains for me to do is the webbing (VMC Green Grey), the helmets and larger pieces of equipment (VMC Brown Violet), flesh areas and finally the weapons (likely to use (VMC Flat Earth).
I'm not going to highlight the uniforms at all and simply oil wash over them with thinned Mig 502 Abteilung Black Oil Paint. I've been using this technique to what I think is a good effect on my recent Elefants and Tiger (P), giving a "black-lined" effect which is manageable. The oil takes so long to dry you can use straight thinner/white spirit to remove excess wash or even adjust where its lying on the model to some degree, I'm hoping this picks out the webbing and things like face details in one fell swoop.
Below is a pic of the current progress on the ARP guys, I'm currently stalled on the Armour for the list as I wait for some better decals and also work out how best to mark the Stuarts in respect to their unit denominations? I've seen large letter/number combos painted on the side of some 1/72 models like C-3 in a very large yellow font on the side of the hull and while I really like this and want to use this sort of marking I want to research it properly first (and possibly find some decals for them too!).
They've been based for a week or so and today I've done the gaiters and jackets on all stands and also their trousers. I'm planning in trying to oil wash all of these guys at once to see how it turns out with a view to using that technique in future for non-camouflaged uniforms. All that now remains for me to do is the webbing (VMC Green Grey), the helmets and larger pieces of equipment (VMC Brown Violet), flesh areas and finally the weapons (likely to use (VMC Flat Earth).
I'm not going to highlight the uniforms at all and simply oil wash over them with thinned Mig 502 Abteilung Black Oil Paint. I've been using this technique to what I think is a good effect on my recent Elefants and Tiger (P), giving a "black-lined" effect which is manageable. The oil takes so long to dry you can use straight thinner/white spirit to remove excess wash or even adjust where its lying on the model to some degree, I'm hoping this picks out the webbing and things like face details in one fell swoop.
Below is a pic of the current progress on the ARP guys, I'm currently stalled on the Armour for the list as I wait for some better decals and also work out how best to mark the Stuarts in respect to their unit denominations? I've seen large letter/number combos painted on the side of some 1/72 models like C-3 in a very large yellow font on the side of the hull and while I really like this and want to use this sort of marking I want to research it properly first (and possibly find some decals for them too!).
Sunday, 19 February 2012
Unit Markings For My German Infantry
I'm stripping and repainting an awful lot of my older infantry in the hope I can get them homogeneous to some degree. I'm using an idea I've seen many other players use to prevent any confusion over unit formations and painting markings onto a small strip on the rear of the bases. Rather than just use random colour combinations I've decided to stay slightly historical and German themed and use the colours that represent their various medal ribbons.
I've started with my already painted Panzergrenadiers, I'm hoping to base and paint the rest of my infantry to match these chaps to a reasonable level. I've added to the rear of their bases the colour combination of the Eastern Front Medals ribbon:
Friday, 17 February 2012
Yes, I have been busy tonight....
Das Reich T-34s, first 4 hit with the airbrush. Still working out the pressures etc with the finer for the two airbrushes which is what I was using this evening and it shows in several spots. In some areas I got the line beautifully fine but then the other areas were that much thicker I ended up double over the fine lines to bulk them out a touch.
Base colour is Tamiya XF-4 Yellow Green, the green is Vallejo Model Air Cam. Greeny 71022 and the brown is again Model Air Tank Brown 71041. On top of all this is a liberal coating of Migs filter for tritonal camouflage, hence the sheen as it's still wet in this picture.
I think you'll agree from the comparison shot that the filter really brings the colours together and looking much more accurate than you'd think anything with that base coat could look? Well I hope so anyway.
Base colour is Tamiya XF-4 Yellow Green, the green is Vallejo Model Air Cam. Greeny 71022 and the brown is again Model Air Tank Brown 71041. On top of all this is a liberal coating of Migs filter for tritonal camouflage, hence the sheen as it's still wet in this picture.
I think you'll agree from the comparison shot that the filter really brings the colours together and looking much more accurate than you'd think anything with that base coat could look? Well I hope so anyway.
Flak Nest Progress.
So I picked up the Flak Nests at Vapnartak in York two weeks back and I've been working on those alongside, frankly, a shed load of other projects but this is their current status.
I've literally just stuck the guns and gunners together, which was very hard due to various minor miscasting problems and low surface areas upon which to glue parts together.
Thursday, 16 February 2012
Quick Spearhead Update
All Stuarts have had a FoW US Armour spray base over grey polyurethane primer, a GW Badab Black wash followed by a heavy Vallejo Brown Violet drybrush. I've only just done the hulls half an hour ago and below is a pic of their current progress.
The tank on the right is how I'm going to paint them all hopefully, perhaps slightly lighter in tone though as I think it looks too much like a British tank rather than American.
Yesterday I received 160 rare earth magnets to magnetise every one of my turreted vehicles as I've been noticing more and more wear/paint damage to my Cromwells and a few other tanks. These Stuarts have all had their turrets and hulls magnetised to not only to protect their paint work but also to protect the phenomenally fragile .30 Cal MGs and their tiny main gun barrels.
The tank on the right is how I'm going to paint them all hopefully, perhaps slightly lighter in tone though as I think it looks too much like a British tank rather than American.
Yesterday I received 160 rare earth magnets to magnetise every one of my turreted vehicles as I've been noticing more and more wear/paint damage to my Cromwells and a few other tanks. These Stuarts have all had their turrets and hulls magnetised to not only to protect their paint work but also to protect the phenomenally fragile .30 Cal MGs and their tiny main gun barrels.
Tuesday, 7 February 2012
HS129 Cont.
Took some mroe pics of my HS129 today as I just finished his base last night and wanted to show the almost finished article. I still need to tidy up the wing edges and I'm waiting for some decent decals that will fit this scale before I progress any further.
Saturday, 14 January 2012
More Again Lessons From the Painting Table
So I've got the Ferdy and Elefant to the stage where I need some matte varnish and then I can weather them but alas my cans are empty so I'm going to leave these until my cans arrive.
In the meantime I've been constructing a 5 x M14/41 Carri Platoon, not for use with Italians as you might think but to go with SS and Sicherungs armies from Grey Wolf.
These guys are truly tiny and will get chewed to pieces by anything bigger than a rifle but I think they could do a job against some infantry who might get caught unsupported? They've got a 12" move, twin MG and coax MG meaning they could really give some PBI a nasty shock.
In the meantime I've been constructing a 5 x M14/41 Carri Platoon, not for use with Italians as you might think but to go with SS and Sicherungs armies from Grey Wolf.
These guys are truly tiny and will get chewed to pieces by anything bigger than a rifle but I think they could do a job against some infantry who might get caught unsupported? They've got a 12" move, twin MG and coax MG meaning they could really give some PBI a nasty shock.
Quick Edit with a 95% complete Ferdinand and Elefant:
Tuesday, 10 January 2012
Sunday, 8 January 2012
New (and old) kit update
So I've been doing some work today, I've based the US Artillery I cleaned up last week, base coated and started my Brummbars that have been sat primed for 4 months, base coloured the 10.5cm guns I've had primed for 8 months, re-primed an ancient Ferdinand I had lying around to paint with the Elefant I just got as part of my Schwerepanzerjagerabteilung 653 Army!
Monday, 2 January 2012
Update on US Guns.
So while I wait for my 155s to arrive and the missing parts from my Elefant to turn up (and listening to the free WWPD After Hours special I downloaded last week!) I've been busy constructing and tidying the M2A1 105s and the Auster AOP to accompany them.
I've only stuck the crew down at the moment as I like to stick/seat the guns slightly into the basing medium so as to have them sitting reasonably naturally on the base and not look too sunken. With these guns I've also based a few spotters and command rifle teams from the US Artillery HQ blister, I've yet to do the two staff teams but I likely only do one as I'll be getting an FDC for whenever I splash the points on those 155s.
With these goes a British Auster AOP, that may initially seem quite strange but I'm working out of Cassino and Commonwealth forces get access to US Support assets but still use the British AOP. I admit is a little fiddly to construct and I haven't pinned the wings on as I was kind of hoping the support struts will stabilise them, I suspect this may be an error but time will tell.
So not only have I moved into the realm of British/Commonwealth infantry here but also the start of an American infantry force too. At first I thought it was cool having that modularity to the Cassino list but now I really it's only served to suck me in to buying more crap... Damn you Battlefront!
I've only stuck the crew down at the moment as I like to stick/seat the guns slightly into the basing medium so as to have them sitting reasonably naturally on the base and not look too sunken. With these guns I've also based a few spotters and command rifle teams from the US Artillery HQ blister, I've yet to do the two staff teams but I likely only do one as I'll be getting an FDC for whenever I splash the points on those 155s.
With these goes a British Auster AOP, that may initially seem quite strange but I'm working out of Cassino and Commonwealth forces get access to US Support assets but still use the British AOP. I admit is a little fiddly to construct and I haven't pinned the wings on as I was kind of hoping the support struts will stabilise them, I suspect this may be an error but time will tell.
So not only have I moved into the realm of British/Commonwealth infantry here but also the start of an American infantry force too. At first I thought it was cool having that modularity to the Cassino list but now I really it's only served to suck me in to buying more crap... Damn you Battlefront!
Friday, 28 October 2011
Jagdpanther and VK4501 updates.
Worked on this guy in between waiting for coats to dry on the VK4501 yesterday, not amazingly detailed but it's what I was going for:
Tidyed up some of the pin wash this morning and glossed over to seal:
Thursday, 27 October 2011
VK4501(P) update.
So I got my hands on a lovely Battlefront VK4501(P) thanks to James as mentioned in the previous post. Here's some pics of it's current progress I've snapped in between working on my British stuff.
It's for a late war army I'm constructing which I'll reiterate at the bottom of this post. Gorgeous looking vehicle and you can really see where the Ferdinand/Elefant came from when you look at the drive train on this beast. I'll be painting this in a tri-tone camo that I'm going to be airbrushing on thanks to my brother in law has loaned me his compressor. The camo pattern will be hit and miss as it'll be made up on the fly and I've never used an airbursh with a compressor before only with canned air (which is crappy btw and ends up costing you as much in the long run). Below are two pictures, one of its base coat and one of its current state.
The base coat I use is a mix of Tamiya XF-4 Yellow Green and some Vallejo 70882 Middlestone, this is beacause I love how Tamiya paints work through airbrushes but the colour is a little too vivid for my liking. To be honest the image still looks very bright and it doesn't look quite so stark in the flesh, I gave the model three coats of Mig Filter for Tri-Tonal camo to try and draw the shades together. This has then received a gloss varnish and a "pin wash" using Mig Abteilung black oil paint mixed with a small amount of white spirit, this achieves a black lined effect quickly, cleanly and most importantly reversibly. If you're too generous with the pin wash you can take a clean brush with white spirit on it and manipulate the section you've made a mistake on, you can thin it down, wash it off parts you don't want it to hit and even remove it altogether.
Tomorrow once this wash has dried I'll give the model a thin gloss coat again to seal it in and apply decals then work on the detailing where I'm planning on making this tank look pretty worn and weathered. I plan to use Panzer Grey as the colour with which to pronounce stone chips and scratches as this would've been the original colour underneath the more recently added tri-tone scheme. After all of that I plan to hit it with some super matte varnish to dull down that shine and also some of the shades in the camo very slightly.
EDIT: I think you can see between the two pictures just how much the XF-4/Middlestone base has really toned down with the camo pattern on it and the coats of filter?
It's for a late war army I'm constructing which I'll reiterate at the bottom of this post. Gorgeous looking vehicle and you can really see where the Ferdinand/Elefant came from when you look at the drive train on this beast. I'll be painting this in a tri-tone camo that I'm going to be airbrushing on thanks to my brother in law has loaned me his compressor. The camo pattern will be hit and miss as it'll be made up on the fly and I've never used an airbursh with a compressor before only with canned air (which is crappy btw and ends up costing you as much in the long run). Below are two pictures, one of its base coat and one of its current state.
The base coat I use is a mix of Tamiya XF-4 Yellow Green and some Vallejo 70882 Middlestone, this is beacause I love how Tamiya paints work through airbrushes but the colour is a little too vivid for my liking. To be honest the image still looks very bright and it doesn't look quite so stark in the flesh, I gave the model three coats of Mig Filter for Tri-Tonal camo to try and draw the shades together. This has then received a gloss varnish and a "pin wash" using Mig Abteilung black oil paint mixed with a small amount of white spirit, this achieves a black lined effect quickly, cleanly and most importantly reversibly. If you're too generous with the pin wash you can take a clean brush with white spirit on it and manipulate the section you've made a mistake on, you can thin it down, wash it off parts you don't want it to hit and even remove it altogether.
EDIT: I think you can see between the two pictures just how much the XF-4/Middlestone base has really toned down with the camo pattern on it and the coats of filter?
Monday, 24 October 2011
Finishing Cromwells, once and for ALL!
So I've had my Cromwell army for quite literally years, it's been through several incarnations without ever being truly finished. They're all base coated in green and certain vehicles are pretty much finished.
Several weeks back I decided the colours I'd done them weren't what I wanted so I re-sprayed them all using my airbrush with a nice base coat of Russian Uniform and I'm going to be using my oil wash on them all and doing a very basic scheme.
I'm currently split between fully decalling them with full unit markings or to simply mark them with their tactical markings so I can chop and change them with Shermans and Challengers and field them as 7th/11th Armoured or even Guards Recce.
The painting table atm:
Several weeks back I decided the colours I'd done them weren't what I wanted so I re-sprayed them all using my airbrush with a nice base coat of Russian Uniform and I'm going to be using my oil wash on them all and doing a very basic scheme.
I'm currently split between fully decalling them with full unit markings or to simply mark them with their tactical markings so I can chop and change them with Shermans and Challengers and field them as 7th/11th Armoured or even Guards Recce.
The painting table atm:
Labels:
11th Armoured,
15mm,
7th Armoured,
battlefront,
Challenger Tank,
Cromwell Tank,
Guards Armoured Recce,
miniature painting,
Sherman Firefly,
toy soldiers,
wargaming,
world war 2,
WW2,
WWII
Friday, 21 October 2011
Hetzers finished!
So I've finally done with my Hetzers, on looking at the photos there's a few tiny bits I either need to touch up or finish off properly but they're certainly ready for a table top outing.
I think I'll go back and add some paint chips and weathering to these at some stage but I've got other units to finish for the tournament next week so these will have to go on the back boiler.
Monday, 5 September 2011
Hetzers!
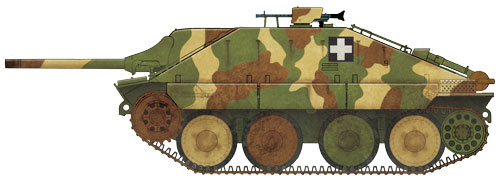
4 Hetzers for my Feldhernalle force, list is done, thanks to a ncie trade with James for a stack half tracks I'm never going to use he got me these and some Pak43s (hoooo yes!). List is pretty much finished and I'm planning on using it to attempt my first tournament entry, Feldhernalle seems like a strange choice but I just get everything I like.
They're hopefully looking pretty Hungarian about now? These aren't Battlefront as you may expect but "Forged In Battle", overall I'm very, very impressed with the quality. Resin hull, with white metal guns (2 options, ones a 75mm gun and the other looks to me to be a flame thrower) and remote fired MG, all made very nicely with only one issue on one gun, which had a slight cast fault but after 30 seconds with a file it's marginally shorter than the other 3 but barely noticeable.
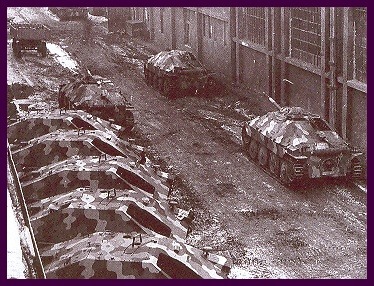
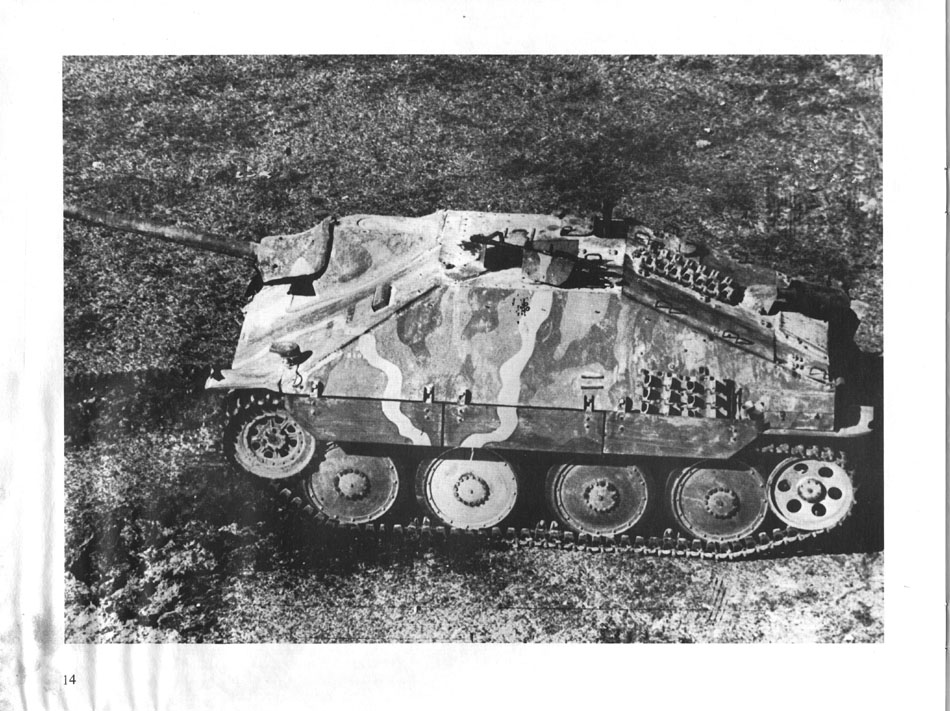
Below is a single WIP pic I've literally just taken along with my inspiration pics, let me know what you think.
They're hopefully looking pretty Hungarian about now? These aren't Battlefront as you may expect but "Forged In Battle", overall I'm very, very impressed with the quality. Resin hull, with white metal guns (2 options, ones a 75mm gun and the other looks to me to be a flame thrower) and remote fired MG, all made very nicely with only one issue on one gun, which had a slight cast fault but after 30 seconds with a file it's marginally shorter than the other 3 but barely noticeable.
Below is a single WIP pic I've literally just taken along with my inspiration pics, let me know what you think.
Subscribe to:
Posts (Atom)