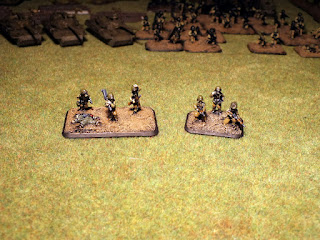
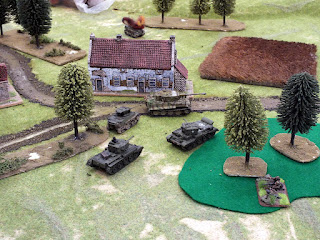
So I got a mini photography studio and I've taken some tester shots to see how much of a difference it makes.
I think the difference is pretty apparent, but I also need to dust my tanks :(
My Painting/Gaming blog for my painting works past and present and recent games.
Saturday, 25 February 2012
Friday, 24 February 2012
Further U.S. Infantry Updates!
Finished these two stands off this morning before I shoot off to work, quick, easy and look good on the table?
Thoughts and CC welcome!
Thoughts and CC welcome!
Thursday, 23 February 2012
U.S. 3rd Armored Update.
Worked a little more on my U.S. Armoured Rifles today.
Got a couple of test stands 90% complete, they just need basing then hitting with a matte spray. I've gone with a flat grey paint for the gunmetal areas for a change to see what sort of a difference this makes, I've seen it done by various painters and it works very nicely.
Again, I'm really not trying to go all out on these guys, just to have them looking decent on the table top!
Building update (long over due)
Like the title says bit of a long over due update. Done a bit of work just today on this after I washed the entire outside and floor boards with MIG enamel dark wash.
I hit up the outside with a dry brush of cavalry brown then a 50/50 mix of middlestone and cavalry brown in a few places. After that was done I painted the drain pipes chaos black then gave them a coat of Vallejo dark rust.
The frame works got a treatment of flat earth and the sills got a coat of stone grey.
As for the shutters I was a bit stumped so I settled for three base colours. Games Workshop foundation Orkhide shade, macharius solar orange and Vallejo chocolate brown. As for highlighting I used snot green on the Orkhide shutters and I plan to use Khermi brown on the chocolate brown ones. As for the orange shutter's I just plan to hit them on with a wash of devlan mud to tone them down a touch. Once the outside is done then the interior walls will be painted stone grey.

Tuesday, 21 February 2012
U.S. 3rd Armored Update.
I'm a little sick of working on tanks at the moment so I've been doing a lot of work on my Armoured rifle Platoon to support my 3rd Armored Division.
They've been based for a week or so and today I've done the gaiters and jackets on all stands and also their trousers. I'm planning in trying to oil wash all of these guys at once to see how it turns out with a view to using that technique in future for non-camouflaged uniforms. All that now remains for me to do is the webbing (VMC Green Grey), the helmets and larger pieces of equipment (VMC Brown Violet), flesh areas and finally the weapons (likely to use (VMC Flat Earth).
I'm not going to highlight the uniforms at all and simply oil wash over them with thinned Mig 502 Abteilung Black Oil Paint. I've been using this technique to what I think is a good effect on my recent Elefants and Tiger (P), giving a "black-lined" effect which is manageable. The oil takes so long to dry you can use straight thinner/white spirit to remove excess wash or even adjust where its lying on the model to some degree, I'm hoping this picks out the webbing and things like face details in one fell swoop.
Below is a pic of the current progress on the ARP guys, I'm currently stalled on the Armour for the list as I wait for some better decals and also work out how best to mark the Stuarts in respect to their unit denominations? I've seen large letter/number combos painted on the side of some 1/72 models like C-3 in a very large yellow font on the side of the hull and while I really like this and want to use this sort of marking I want to research it properly first (and possibly find some decals for them too!).
Monday, 20 February 2012
Monday Afternoon Game.
So my mate Stoo, who originally got me into FoW years ago, has picked up V3 and has some renewed interest in FoW so we decided to have a rules game to try out the new rules and a list he'd drawn up from Red Bear. I was running my SS Kavallerieschwadron which is finished model wise but I'm still painting several platoons.
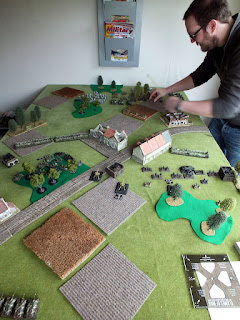
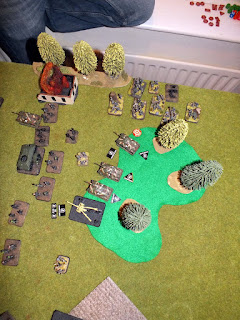
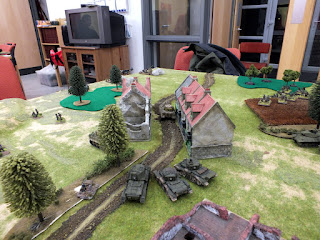
Below is a few pictures from the game and you can see Stoo being a bit vexed by his situation. Warning, there are a lot silver surfers on the table here but it's just a friendly, rules and list tweaking game in my "war-room"!
We played No Retreat with myself as the defender.
EDIT: Yes, the last pic is of 3 bogged Hetzers, "overloaded" is a bloody nightmare!
Sunday, 19 February 2012
Unit Markings For My German Infantry
I'm stripping and repainting an awful lot of my older infantry in the hope I can get them homogeneous to some degree. I'm using an idea I've seen many other players use to prevent any confusion over unit formations and painting markings onto a small strip on the rear of the bases. Rather than just use random colour combinations I've decided to stay slightly historical and German themed and use the colours that represent their various medal ribbons.
I've started with my already painted Panzergrenadiers, I'm hoping to base and paint the rest of my infantry to match these chaps to a reasonable level. I've added to the rear of their bases the colour combination of the Eastern Front Medals ribbon:
I've started with my already painted Panzergrenadiers, I'm hoping to base and paint the rest of my infantry to match these chaps to a reasonable level. I've added to the rear of their bases the colour combination of the Eastern Front Medals ribbon:
Sunday 19th Feb Game Pics.
Mixture of game pics from my local club, they're from several different games going on over the course of the day, followed by pics of Rommel my cat and his unnatural urge to lie on not only my tanks but also my infantry....
Friday, 17 February 2012
Yes, I have been busy tonight....
Das Reich T-34s, first 4 hit with the airbrush. Still working out the pressures etc with the finer for the two airbrushes which is what I was using this evening and it shows in several spots. In some areas I got the line beautifully fine but then the other areas were that much thicker I ended up double over the fine lines to bulk them out a touch.
Base colour is Tamiya XF-4 Yellow Green, the green is Vallejo Model Air Cam. Greeny 71022 and the brown is again Model Air Tank Brown 71041. On top of all this is a liberal coating of Migs filter for tritonal camouflage, hence the sheen as it's still wet in this picture.
I think you'll agree from the comparison shot that the filter really brings the colours together and looking much more accurate than you'd think anything with that base coat could look? Well I hope so anyway.
Kerr & King Minefield and Wire Sections
Just finished these this evening, they're the pioneer set from Kerr & King and set me back the not so princely sum of £16 at a Vapnartak a few weeks back. They have a lot of bubbles in the resin but specifically on the dead infantry and not really anywhere else. I can live with this as once painted they're presentable enough and will serve my pios well!
I'm going to drop a devlan mud wash onto the wire to stop it being quite so shiny, I really did a rush job on this as it's been sat in its base colours for a week and I just wanted it finished and presentable.
Flak Nest Progress.
So I picked up the Flak Nests at Vapnartak in York two weeks back and I've been working on those alongside, frankly, a shed load of other projects but this is their current status.
I've literally just stuck the guns and gunners together, which was very hard due to various minor miscasting problems and low surface areas upon which to glue parts together.
I've literally just stuck the guns and gunners together, which was very hard due to various minor miscasting problems and low surface areas upon which to glue parts together.
Thursday, 16 February 2012
Quick Spearhead Update
All Stuarts have had a FoW US Armour spray base over grey polyurethane primer, a GW Badab Black wash followed by a heavy Vallejo Brown Violet drybrush. I've only just done the hulls half an hour ago and below is a pic of their current progress.
The tank on the right is how I'm going to paint them all hopefully, perhaps slightly lighter in tone though as I think it looks too much like a British tank rather than American.
Yesterday I received 160 rare earth magnets to magnetise every one of my turreted vehicles as I've been noticing more and more wear/paint damage to my Cromwells and a few other tanks. These Stuarts have all had their turrets and hulls magnetised to not only to protect their paint work but also to protect the phenomenally fragile .30 Cal MGs and their tiny main gun barrels.
Tuesday, 14 February 2012
Tuesday Night Game.
Different night, different club, different opponent!
I'm just6 gonna dump pictures here then add comments tomorrow!
I'm just6 gonna dump pictures here then add comments tomorrow!
Subscribe to:
Comments (Atom)


